
Time programmable controller
| Place of Origin | China |
|---|---|
| Brand Name | okled |
| Model Number | TC420 |
| Input Voltage | DC12V |
| Correlated Color Temperature | -20-60°C |
| Inquiry | |
Detailed Product Description
Product Specification
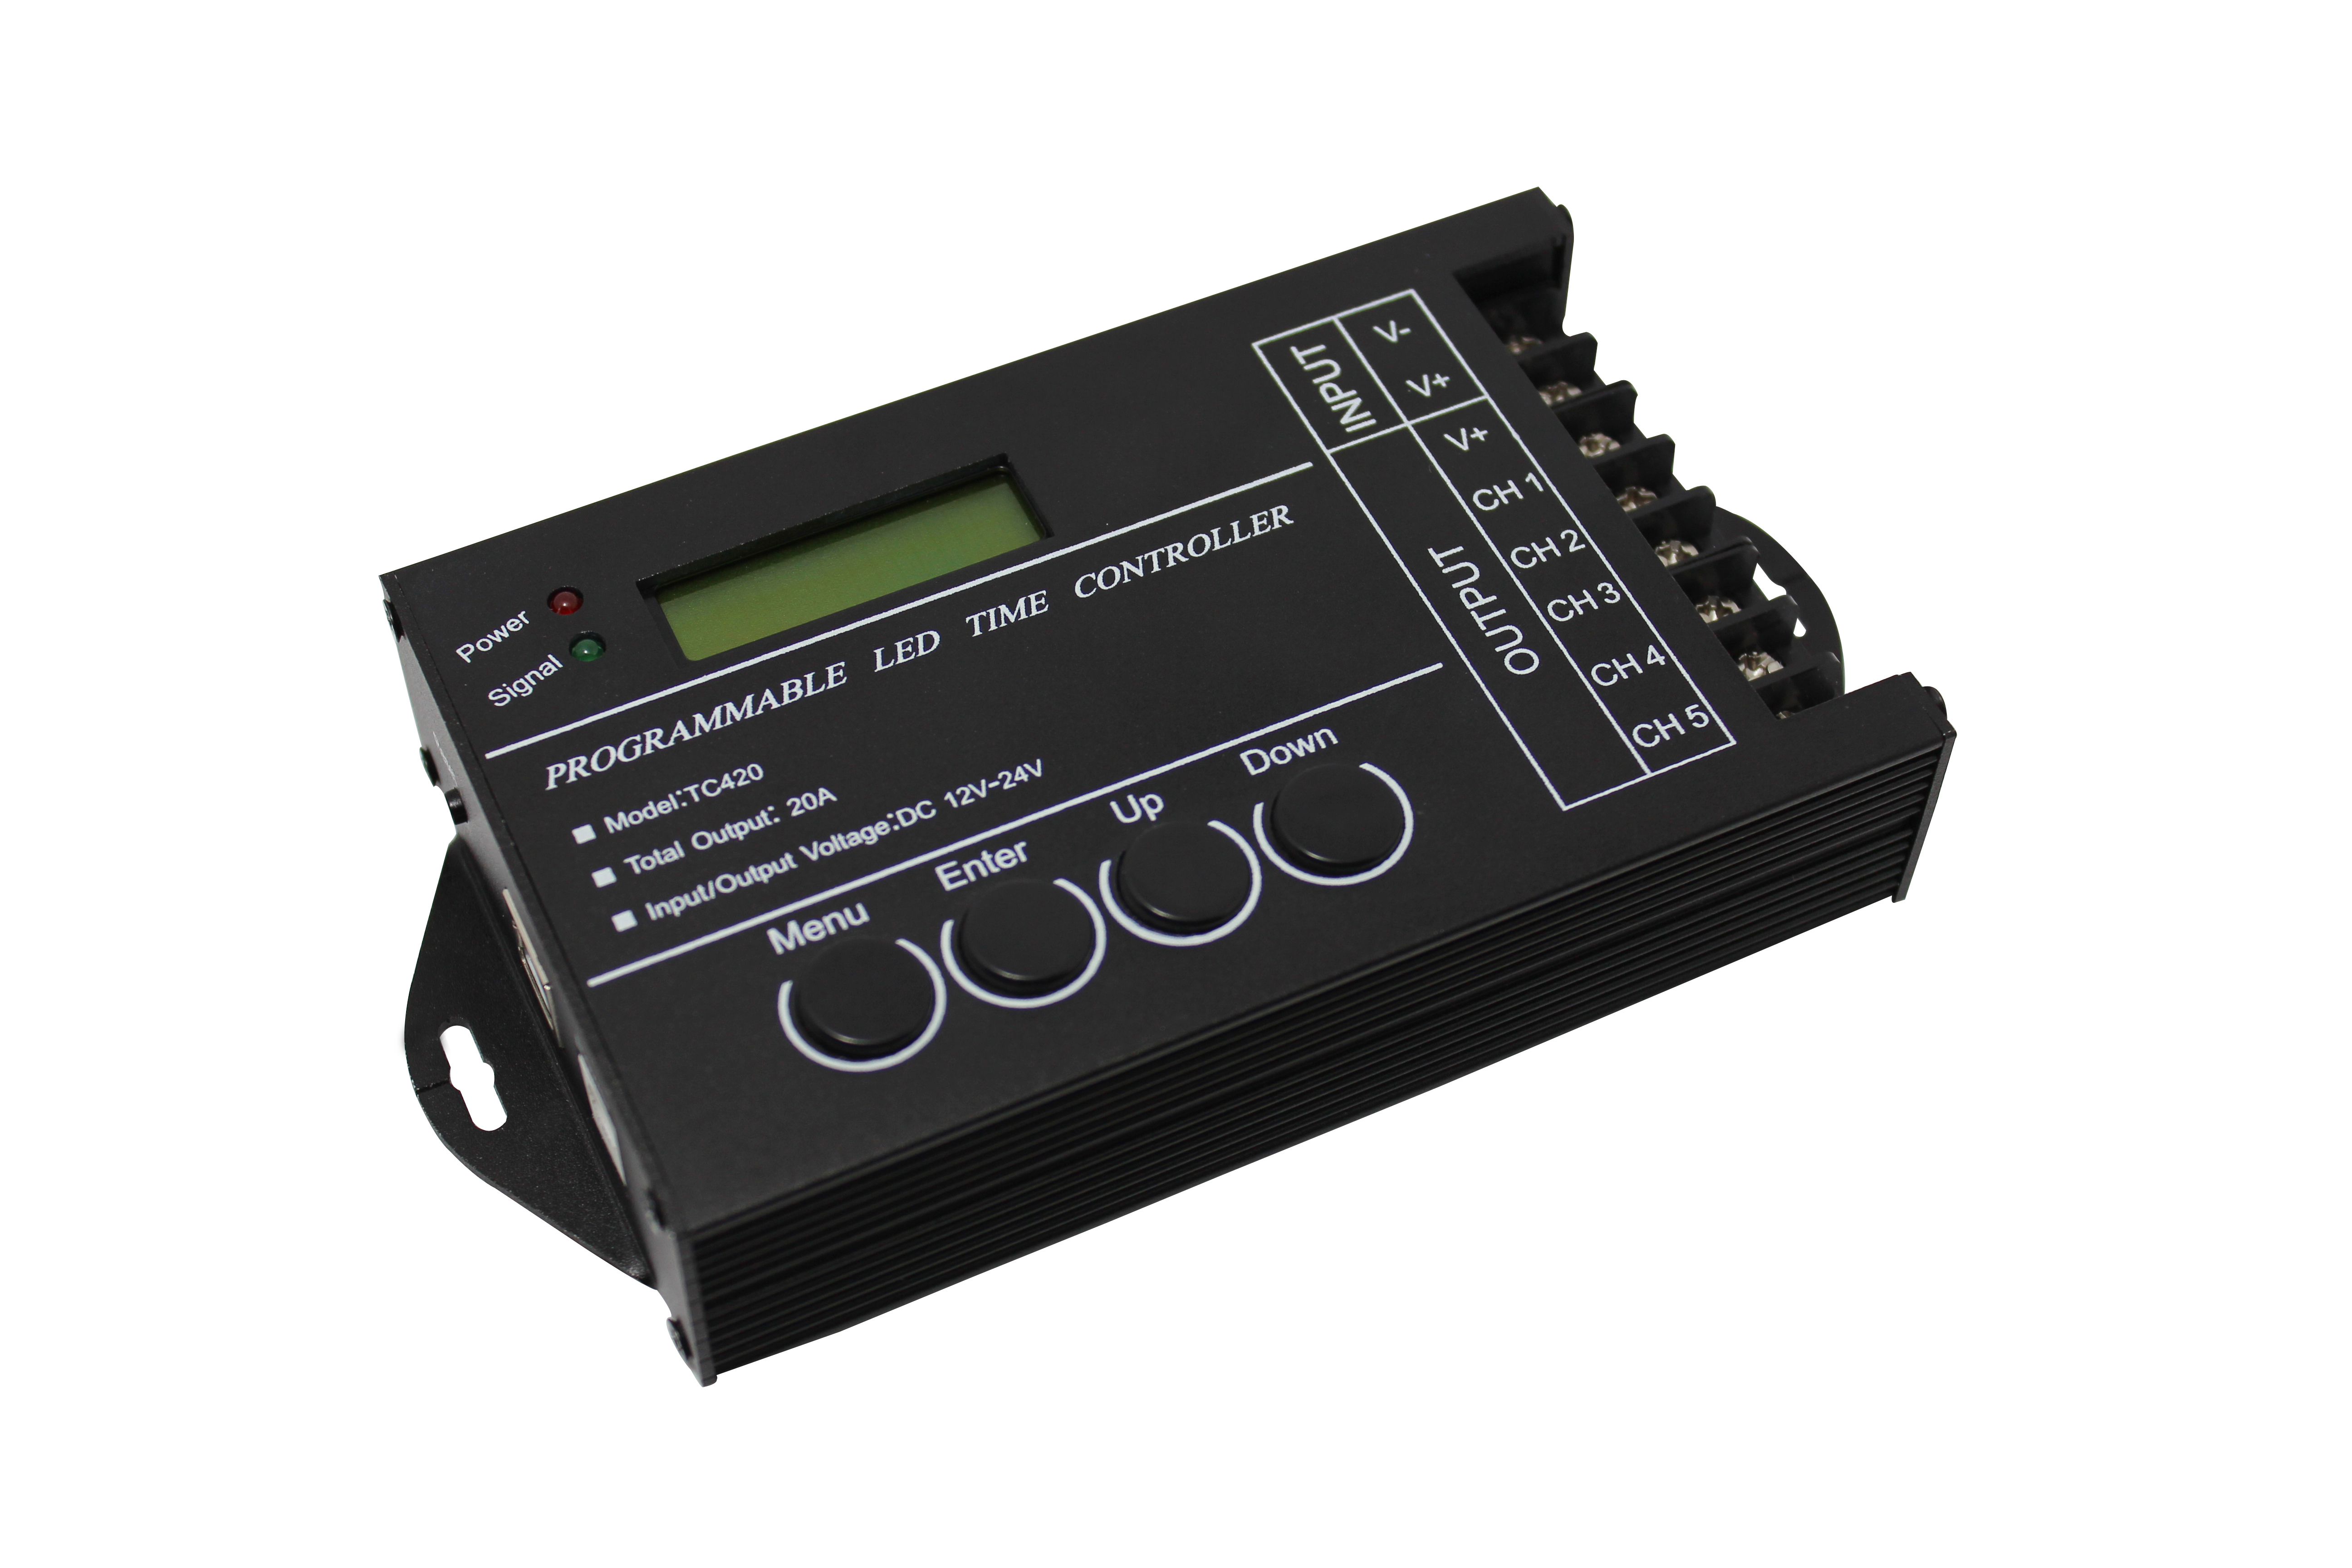
Name:Programmable time led controller
Model:TC420

Summarization
Here is an upper computer in the programmable time controller to make the load output change over time, the customer may customize schedule mode they want through the upper PC. Then through the USB port to download required schedule to the controller.The upper PC in addition to the function of editing schedule mode ,it also can be setup time for the controller because of synchronous clock function of upper host .If user want to see the schedule mode effect after editing , they can use fast sowing function of upper . Because there is no delete function of the upper host ,so the mode name display space will come into blank as long as you execute delete .This controller can control load of led changing effect no more than five channels .And it can be used in the occasion of the plant lights, light box advertising, the stage, home decoration, etc.
Technical parameters
Working temperature: -20-60°C
Supply voltage: DC12V
Static power consumption: < 0.5W
Net weight: 200g
Gross weight: 300g
External dimension: 120MM*69MM*24MM
Packing size: 169MM*135MM*53MM
Output: 5 channel
Maximum output current: 20A
Function instructions
There are two kinds of modes like energy saving mode and setup mode in this controller , and also there are four buttons such as "Menu", "Enter", "+", "-" in it.
1. Power saving mode
When the controller in the situation of setup mode without any key press in 30 seconds , the screen background light will be closed, and if within 30 seconds there is still no any key press, the controller will go into the energy saving mode .
When the controller is in the energy saving mode, the first line of the screen shows that the current date and mode; the second line displays the current time.
Energy saving mode is as shown in figure 1:
0 3 - 0 7 - 2 2 M o d e 1
0 0 : 0 0 : 0 0
Figure 1
2. Setup mode
1>. Press "Menu" button in the main menu, it will enter into the time display interface.
The first line of the time display interface shows the current time or date and mode, it will
automatically switch every two seconds .
The second line shows that "[Menu]", press "Enter" button to access the main menu interface.
Time display interface is as shown in figure 2:
0 3 - 0 7 - 2 2 M o d e 1
[ M e n u ]
Figure 2
2>. When press "Enter" button in the time display interface , or "Menu" button in the submenu of the main Menu , it will go into the main Menu.
The first line shows the location of " [Menu] "in the main Menu of the display .
The second line of the display shows "1. Mode", "2. Setup" or "3, Run", that you can switch each
mode by pressing the key "+" and "-" .
Press "Enter" button,it will access the corresponding setting mode ; and press the "Menu" button to
return to the time display interface .
The main menu display is as shown in figure 3:
[ M e n u ]
1 . M o d e
Figure 3
3>. Select "1. Mode" in the main menu and press "Enter" button to go into the mode choice options .
The first line of the display shows the location of "[Mode]" in mode selection status .
The second line shows that the name of mode choice such as: "Mode11" .
Press the "+" or "-" key to choose mode , and save the selection mode ; Press the "Menu" button to return to the main menu.
The mode choice of display is as shown in figure 4:
[ M o d e ]
M o d e 1 1
Figure 4
4>. Select "2. Setup" in the main menu and press "Enter" button to go into the Setting menu ;
The first line of the screen shows the location of "[Setup]" in the setting menu status .
The second line of the display shows "1. Time" and "2. Date" or "3. Sound", you can select setting
object through the key "+" or "-" .
Press "Enter" button to access the corresponding Settings, and click "Menu" button to return to the main Menu.
Setting menu is as shown in figure 5:
[ S e t u p ]
1 . T i m e
Figure 5
I. In the status of setting menu , choose "1. Time" and press "Enter" button, it will enter into time setting mode;
The first line of the screen shows the location of "[Time]" in the time setting status .
The second line of display shows the setting time ": hour: minute : second", for instance ,
"11:16:56" is the current setting time.
Press "Enter" button to choose every setting number ( hour / minute /second ), as you seen ,in editing state , the selected area will be flashing .
Press the key "+" to add 1 , when the number reach maximum , it will return around to the
Minimum value ;
Press the key "-" to reduce 1 ,when the number reach minimum , it will be back to the maximum
value .
Press the "Menu" button to save and return to the setting menu .
Setting mode displays as shown in figure 6:
[ T i m e ]
1 1 : 1 6 : 5 6
Figure 6
II. In the status of setting menu , choose "2.Date" and press "Enter" button, it will enter into date setting mode;
The first line of the screen shows the location of "[Time]" in the date setting status .
The second line of display shows the setting date " year - month - day " , for instance "13-01-01" is
The current setting date .
Press "Enter" button to choose every setting number ( year / month / day), as you seen ,in editing state , the selected area will be flashing .
Press the key "+" to add 1 , when the number reach maximum , it will return around to the
Minimum value ;
Press the key "-" to reduce 1 ,when the number reach minimum , it will be back to the maximum
value .
Press the "Menu" button to save and return to the setting menu .
Setting mode displays as shown in figure 7:
[ D a t e ]
1 3 - 0 1 - 0 1
Figure 7
III. In the status of setting menu , choose " 3 .Sound " and press "Enter" button, it will enter into sound setting mode ;
The first line of the screen shows the location of "[sound]" in the sound setting status .
The second line of the display shows "OPEN" or "CLOSE" which means the situation of sound
setting .
Press the key "+" or "-" to switch voice close or open ;
Press "Menu" button to return to the setting menu .
Sound Setting is as shown in figure 8:
[ S o u n d ]
O P E N
Figure 8
5>. In the status of main menu , choose " 3.Run " and press "Enter" button, it will enter into run menu;
The first line of the screen shows the location of "[Run]" in the run menu .
The second line of the display shows "Start " or " Stop " which means the on/off situation of the
controller .
Press the key "+" or "-" to start or shut down .
Press "Enter" button to execute user's option; and press the "Menu" button to return to the main
Menu .
Run menu displays as shown in figure 9:
[ R u n ]
S t a r t
Figure 9
External dimension

Interface instruction
Input interface:

1).It is the reset button, when the controller crash, can touch this key to reset.
2).It is USB signal joint entrance, when epistatic machine model after editing, can through the USB line to download to the controller.
3).It is DC plug, when the load power is small, can choose this port to input voltage.
Output interface:

1>.It is the load output 5th channel negative pole;
2>.It is the load output 4th channel negative pole;
3>.It is the load output third channel negative pole;
4>.It is the load output second channel negative pole;
5>.It is the load output first channel negative pole;
6>.It is the load output common anode;
7>. 8>.It is power supply input positive and negative pole, when the load power is too large, you can choose this 2 port. (Remark: you only need to choose one between power supply input port and this 2 port )
Typical application
